Crafting
How to Make Epoxy Resin (Glitter) Tumbler Cups
HOW TO MAKE EPOXY RESIN (GLITTER) TUMBLER CUPS
LEARN THE STEP BY STEP WAY TO MAKE YOUR OWN DIY EPOXY RESIN (Glitter) TUMBLER CUPS.
This tutorial not only gives you the steps you need to make your own beautiful epoxy resin glitter tumbler cups, but more importantly, I’m gonna share some great tips on where you can purchase supplies.
HOW TO MAKE EPOXY TUMBLER CUPS
Custom epoxy tumbler cups are such a fun DIY craft project. These cups are SUPER-popular right now and you know why? Because the designs are endless and only limited by your imagination!
When I made my first tumbler, I was so intimidated. If this is your first cup, don’t be afraid…I’m gonna help you from start to finish!
Before you get started, keep in mind that you can’t cut corners. What I mean is this tumbler cup project can be a little time consuming. Each layer of paint, glue, and glitter need time to dry. Also, each coat of epoxy has to cure before applying another layer.
SUPPLIES YOU’LL NEED:
- Epoxy Resin
- Measuring Cups
- Mixing Stick
- Nitrile Gloves
- Stainless Steel Tumbler
- Cup turner
- Silicon Brush
- Baby Wipes
- Acetone
- Electrical Tape
- Spray Paint
- Respirator Mask
- Heat Gun or Torch
IMPORTANT NOTE: Epoxy can be a skin irritant and can have a strong smell. More importantly, epoxy fumes can be toxic while it’s curing. As a result, it’s important to wear a good respirator mask and nitrile gloves while working with epoxy. Also, it’s best to work in a well-ventilated area while the epoxy is drying.
How to choose your tumbler
The best stainless steel tumblers to use for this project can easily be purchased online or at your local stores. A lot of people use double-walled stainless cups from Walmart. I personally don’t prefer those cups because their logo has a negative embossed look. They are great cups but it’s tricky to cover up the logo.
The cups I use can be found at the following links:
These double-walled stainless steel tumblers are great because the logo is etched and can easily be covered with paint and glitter. The cups are also great at keeping drinks hot or cold.
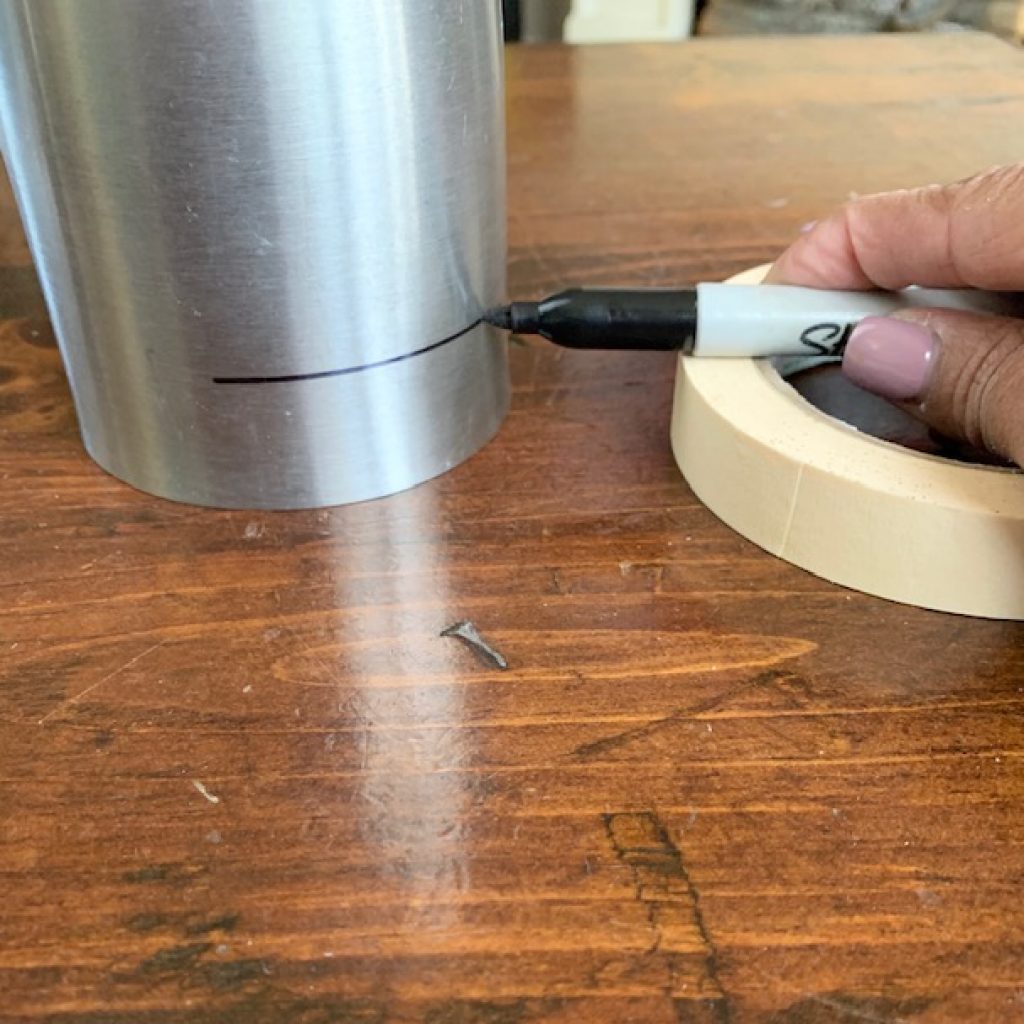
How to tape your tumbler
You can make your tumbler cup with or without the free edge on the top or bottom. If you don’t want to mask the top or bottom of your tumbler cup, you can skip this step.
An easy way to tape your cup is to place a pencil or sharpie on a stationary object, hold your pencil in place as you turn the cup with your other hand. The mark on the cup will be perfect every time.
I like to use electrical tape on my tumblers because it peels off great leaving a very clean line. Painters tape can also be used.
Simply line up your tape right at the line that you marked and voila’ it comes out beautifully!

How to prep your tumbler
The stainless tumblers need to be prepped a little before you start painting or adding glitter. Once you have taped your cup, give the exterior a light sanding with sandpaper all over the areas that are exposed.
I recommend doing the light sanding by hand with sandpaper and not with a hand-sander. WHY you ask? Because I tried using a hand-sander once and it didn’t go over so well — in fact, I messed up the whole cup.
Once you complete the sanding process, put a little dish soap on by hand and wash the cup to get off any dust. Dry your cup completely with a paper towel.
How to apply your paint
I generally use flat spray paint to spray the exterior of my tumbler cups. Use quick short bursts all over the cup until it’s completely covered.
Be careful not to apply too much paint or it will drip. If that happens, you may be able to cover with glitter. If you’re not applying glitter, you may be able to cover up the goof with a vinyl sticker. Otherwise, you might have to remove the paint and start all over.
How to apply and seal glitter
If you’re making a cup for a guy who isn’t crazy about glitter, skip this part of the tutorial.
Using the Mod Podge method, paint a layer of Mod Podge on your entire tumbler. Place a piece of parchment or plain paper down on your surface. Liberally sprinkle glitter on the entire cup until completely coated.
Mod Podge dries clear. So, if you feel like the glitter didn’t cover well enough, let it dry first. Then all you have to do is paint another coat of Mod Podge on the entire cup and add another layer of glitter.
Another easy way to glitter your cup is by spraying the outside with Loctite Spray Adhesive.
If you use a spray adhesive, sprinkle glitter on liberally before the spray adhesive dries.
REMINDER: Have a piece of paper under your cup while you sprinkle it with glitter because you’ll want to save the excess glitter for other projects. Waste not, want not!
How to properly mix and apply epoxy resin
There are many brands of epoxy resin on the market. Some epoxy resins have a strong smell and others don’t. Either way, it’s super important to wear a respirator mask when mixing and pouring your epoxy.
If the epoxy is not measured precisely it will not harden correctly and can remain sticky.
Epoxy resin comes in two parts. Part A is the resin and part B is the hardener. The epoxy MUST be mixed in equal parts. Don’t mess this part up or you will not be happy.
I use pre-marked measuring cups to measure my epoxy.
TIP: I also put my epoxy into squeeze bottles to make pouring easy.
Carefully measure your epoxy into individual cups and pour them both into one cup.
Using a craft stick, gently mix your epoxy for a full 3-minutes or according to the package instructions. Be careful not to mix too fast which can create bubbles.
Once your epoxy is mixed for the full 3-minutes, it’s ready to pour on your cup.
How to apply epoxy to your tumbler cup
Place your cup securely on your cup turner. Start the turner so it turns in the direction of your dominant hand. You can also use silicone brushes to gently sweep the epoxy on your cup so that it’s covered evenly.
Pour a line of epoxy onto the cup as it’s spinning. Allow the cup to gently sweep your gloved finger as it turns as you move the epoxy with your fingers up and down the cup. Do this until the cup is completely covered. Be sure to cover the bottom of the cup with epoxy if it’s not taped off.
Let’s talk about Air Bubbles
It’s normal to have some air bubbles come to the surface of your epoxy. To get rid of the bubbles, use a little heat from a heat gun or torch. Pass the heat quickly over the surface of the cup. This will pop any bubbles that come to the surface.
How long to wait between additional coats of epoxy
First off, if you taped the rim of your cup, you’ll want to remove it before the epoxy fully cures. Besides the tape potentially getting stuck in the cured epoxy, you may find if you don’t pull the tape up, the edge can pull your glitter away unevenly and that’s no fun.
Tape can usually be removed after about 30 minutes on the cup turner.
After you remove the tape, continue to let the cup spin until it’s dry to the touch. If you take it off the spinner too quick, the epoxy can drip and not dry evenly.
Once your first coat of epoxy resin dries, apply a second coat and allow it to dry.
Re-apply tape just beyond your prior tape line to leave a small gap for the epoxy to settle. Put one more coat of epoxy on your cup and allow it to dry.
How to put your vinyl decals on your tumbler cup
If you have a Cricut cutting machine, cutting out monograms, designs, and other fun things to put on your cup is a breeze. You can use just about any type of vinyl to design your cup. Pre-made decals are also fun to use when decorating your cup.
If your tumbler cup has a curve to it, think about where you want your decal before you stick it down. Otherwise, the decal can kink up and it doesn’t look so great.
To apply your decal, bend the decal in half so you can place the center of the decal down first. Gently roll one side of the decal down while applying pressure and repeat on the other side. Use your scraper to work out any tiny air bubbles.
How to get a glass-like finish on your tumbler cup
To get a glass-like finish on your tumbler cup make sure you smooth out any rough spots that you can feel with your hands. Repeat the process for coating the tumbler cup with epoxy. Allow the cup to fully cure.
Epoxy can take up to 72 hours to fully cure depending on the temperature of your room.
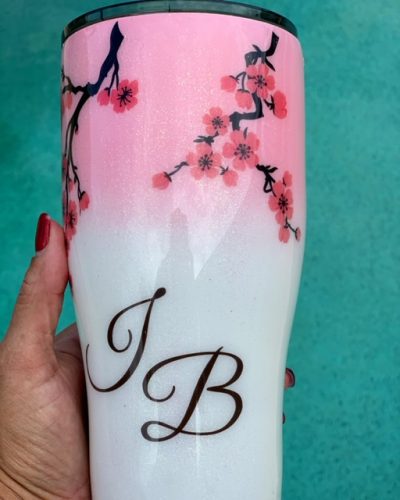
Once the epoxy resin is totally dry, the tumbler will have a stunning glass-like finish.
I hope this tutorial helps you with your epoxy tumbler cup.
Leave me a comment and share photos of your tumbler cup project.