Let's Bake
HOW TO MAKE SANDWICH BREAD AT HOME (EASILY)
HOW TO MAKE SANDWICH BREAD AT HOME (EASILY)
I know I write a lot about DIY Cakes and Crafts. But when the Covid-19 pandemic hit and people started cleaning out the grocery store shelves it really made me sad. Instead of focusing on the negative, I immediately felt the need to help others. That’s why I decided to share how to make sandwich bread at home.
Have you tried to go grocery shopping lately? If you have, you likely noticed that bread was one of the first things to fly off the shelves. While everyone was buying bread, there didn’t seem to be a shortage of flour or other baking ingredients.
Whether you are working remotely from home or you have hungry kids at home, it helps to have an easy go-to recipe for sandwich bread.
BAKING DOESN’T HAVE TO BE COMPLICATED
In this tutorial, I’m going to walk you through the easy-to-follow steps so you can make bread at home.
Maybe you’ve never made bread before or it just seems too complicated. Trust me, making bread is easy.
Once you start baking your own bread, you may not go back to store-bought brands.
BENEFITS OF HOMEMADE BREAD vs. STORE BOUGHT
There are several benefits to making bread at home versus buying it from the stores. Here are just a few reasons why I love making my own bread:
- More economical, the cost of a sack of flour cheap
- You control the ingredients, that means no chemicals
- Easy to make
- Most ingredients are already in your pantry
- Never have to worry about the stores running out
Ingredients you’ll need for this Easy Sandwich Bread Recipe are:
- Water
- Honey
- Instant Yeast
- Salt
- Unsalted Butter
- All-purpose Flour
- Dry milk powder – or Dry Coffee Creamer (I’ll explain more on this)
WHAT IS MILK POWDER ANYWAY?
Milk powder is a milk that has had the moisture evaporated from it. This dry form of milk has a very long shelf life. It usually has to be reconstituted with water. However, dry milk powder is often used in recipes like this one.
Most people don’t have dry milk powder in their pantry. It’s totally okay if you don’t have any. If you’re a coffee drinker, you likely have powdered coffee creamer in your pantry and guess what, it’s the perfect replacement for dry milk powder.
SAY WHAT?!? Yep, seems weird, but reality is dry coffee creamer has very similar qualities of milk powder. This will add a bit of richness to the bread and contributes to the texture.
Note, do not use the flavored type powdered creamer
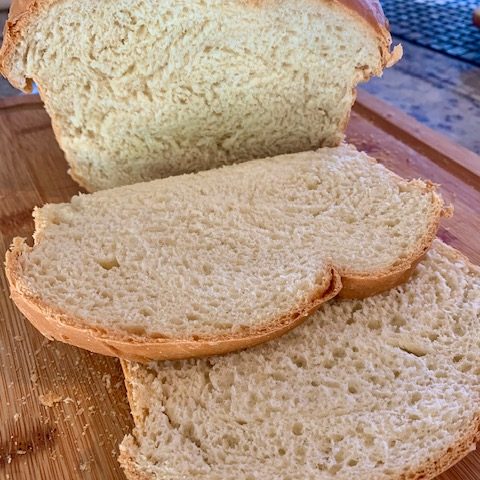
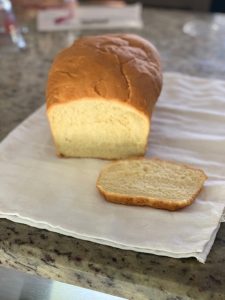
(EASY) SANDWICH BREAD RECIPE
This sandwich bread recipe is super easy and delicious.
Ingredients:
- 1 cup Plus 2 tablespoons of Warm Water
- 1 tbsp Honey
- 2 ¼ tsp Instant Yeast
- 1¾ tsp Salt
- 2 tbsp Butter or Shortening
- 4 cups All-purpose Flour
- 1/3 cup Milk powder or Dry Coffee Creamer
Instructions:
- Add water and honey to your mixing bowl.
- Sprinkle instant yeast over the surface of water.
- Add all remaining ingredients and mix using the dough hook of a stand mixer or mix by hand.
- Once all of the ingredients come together, lightly dust the surface with a little sprinkle of flour.
- Knead dough until a smooth ball is formed.
- Place dough in a lightly oiled bowl and cover lightly with a kitchen towel.
- Allow the dough to rise until doubled in size. This may take 1-2 hours depending on the temperature of your room.
- Once the dough is doubled in size, you should be able to leave an indentation when you poke the dough with your finger.
- Place dough on a lightly floured surface.
- Punch down dough to deflate the air that has formed in the dough.
- This recipe can make one large loaf or two small ones. I made one large loaf.
- Place dough in a loaf pan that has been lightly sprayed with pan spray.
- Place the pan in a draft-free area (like a microwave) and allow the dough time to rise one more time.
- Preheat the oven to 350° degrees.
- Once your bread dough has fully risen, place it into the preheated oven.
Enjoy your homemade sandwich bread!