
How to Make a Fondant Ruffle Cake

HOW TO MAKE A FONDANT RUFFLE CAKE
In this tutorial, I’ll show you just how easy it is to make a Fondant Ruffle Cake. I’ll walk you through the step-by-step process so you can make your own ruffle cake.
Tools you’ll need:
-
-
-
- Ball tool
- Circle Cutter (or large piping tip)
- Rolling Pin
- Fondant
- One cake, prepped with icing on the sides
-
-
FONDANT RUFFLE CAKE
Making fondant ruffles on a cake has never been easier. This technique is perfect for those who are beginners because it’s very forgiving. The sides of the cake don’t have to be ultra-smooth because the ruffles are going to give perfect coverage.
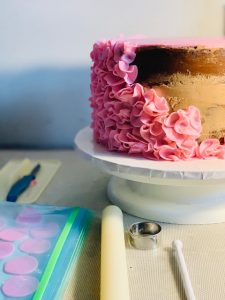
The cake I used in this tutorial was a chocolate cake, iced in ganache and a thin layer of Italian buttercream. I put just enough buttercream on the sides to give the ruffles something to stick to.
Once the cake was iced, roll out a thin layer of fondant the same color that you will be using for the ruffles. Place your fondant on the top of the cake and trim it so that only the top is covered with fondant.
Check out my YouTube Video here:
CREATING THE RUFFLES
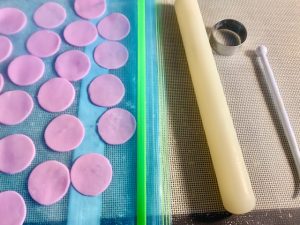
Thinly roll out some fondant the same color that you used for the top of the cake. Cut out circles using a circle cutter or the back of a large piping tip.
The circle cutter I used was 1.5” inches. You can also use the back of a large piping tip to cut out the circles.
Once you have your circles are cut out, cover them with plastic wrap. You can also place your cutouts in a single layer inside of a plastic zip top bag.
Dust your fondant with a little cornstarch to prevent sticking. Using the ball tool or the back of a small rolling pin, thin the edges of the cutout. Cup the middle of the circle using the ball tool. Fold the circle in half and flare out some of the edges.
You cannot mess this up! The beauty of this cake is that every ribbon is uniquely different.
PLACING RIBBONS ON CAKE
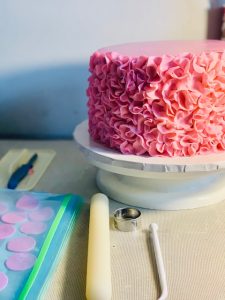
Start at the bottom of your cake and place your first ribbon against the buttercream. Continue filling in all the gaps until you have completely covered the sides of your cake.
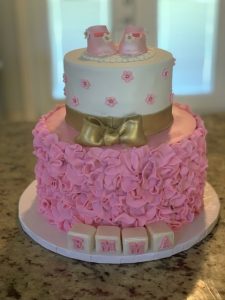
The cake I used in this tutorial was a 9” inch cake and it was approximately 5” inches in height. It took almost two hours to place all of the ribbons on the cake, but the result was spectacular!
Once my entire cake was completely covered with fondant ribbons, I placed dowels in the center of the cake and added the second tier.
Was this tutorial helpful to you?

If this was helpful to you, please leave me a comment.
And as always, if there is some other type of tutorial you would be interested in learning, let me know.
Related Posts

What are Hot Chocolate Bombs?
Quite possibly the season’s hottest trend (no pun intended) – Hot Chocolate Bombs…

Cake Maker Challenge
Join the private Cake Maker Challenge Group! 2020 has turned out to be a weird…