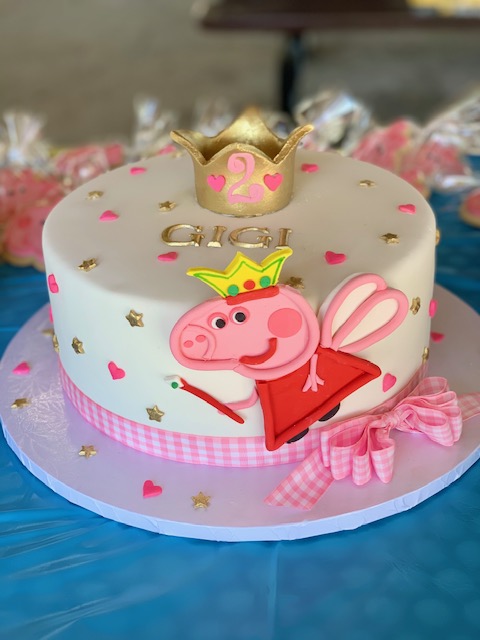
PEPPA PIG CAKE
Learn how to easily make your own Peppa Pig Cake in this tutorial. In this brief tutorial, I’m going to share how I created this perfect Peppa Pig theme cake inspired by a photo given to me by my customer.
WHO IS PEPPA PIG?
Peppa Pig is a popular preschool cartoon series that has been on television since 2004.
Peppa and her brother George have lots of animal friends like rabbits, sheep, cats, ponies, dogs, zebras, elephants just to name a few.
Even though the characters are like people living in houses, wearing clothes and driving cars, they are still animals. Peppa and her friends always have fun adventures. So, it’s no wonder why kids love Peppa and her animal friends.
INSPIRATION FOR A PEPPA PIG CAKE
As you may know, I have been creating cakes for many years. Sometimes my customers bring me photos of cakes they love. And sometimes I am given the creative freedom to bring design elements to life.
This Peppa Pig cake was inspired by photo that my customer provided me. I don’t know who created the original version of this cake, so if you know who it was, send me an email so I can give them a shout-out!
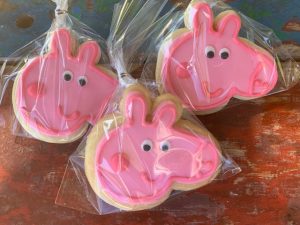
The cake was super fun to make. I also created cute little matching Peppa Pig sugar cookies for this party. I’ll give you helpful tips on how I created those as well.
FUN MARBLE CAKE
Making this Peppa Pig Cake was super fun to me but my customer wanted me to kick up the theme a little more. What do I mean? I was asked to make a strawberry/lemon cake. The colors on the inside of the cake pulled the whole theme together.
Instead of creating two separate layers of cake in strawberry and lemon, I decided to make a marble cake with both flavors. Why not have the best of both worlds in each bite.
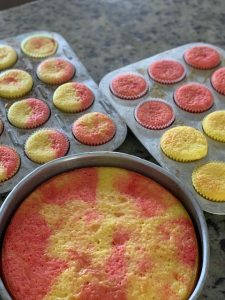
Creating marble cake is easy. You can make your own recipe of cake either homemade or a doctored-up box mix.
I often times start with one recipe of vanilla cake and split the batter into two bowls. For the strawberry, add a few drops of LorAnn Oils strawberry flavor, fresh strawberries or puree to the mix and a couple drops of pink food coloring. The lemon cake can be made with fresh lemon rind, lemon oil from LorAnn Oils or lemon extract. Add just enough yellow food coloring to give it the nice lemon-yellow color.
Prepare 2 lined cake pan and give it a generous spray of pan coat so the cake doesn’t stick.
Once your cake pan is about 1/2 full, place the cakes in the oven to bake at 350 degrees.
HOW TO CHECK THE CAKE FOR DONENESS
aaaahhhh, THE SMELL OF CAKE!
Once you start smelling cake in the air, your cake is almost done. Smell is not the sign of doneness but it’s a reminder not to wander away so you don’t burn your cake layers.
Using a clean skewer, test the cake for doneness by inserting into the cake. There may be a few crumbs on the skewer but it should not be wet in any way. If the skewer is wet, that means your cake is not done.
Once the skewer comes out clean, you cake is done.
COOL YOUR CAKES
Allow your cakes to cool off before attempting to turn them out of the pans. If you turn the cakes out too quickly, they can sometimes break off at the edges.
Turn your cakes onto a cooling rack and allow them to completely cool off. Once the cakes are cool, wrap them in plastic wrap and pop them in the freezer. Yes…the freezer. I’ll explain why below.
WHY I FREEZE CAKES
Ok, there’s a lot of people that will tell you they never freeze their cakes. There’s lots of ways to make and store cakes but I always freeze my cakes and let me tell you why.
Although I cool my cakes off, I they still have a tendency to be a bit warm when I wrap and freeze them. The logic is this – steam and condensation gets caught in the cells of the cake. When the cake freezes, the condensation forms crystals. When you unfreeze your cake, the tiny ice crystals thaw out and the moisture remains in the cake.
Moist cake = Happy customers!
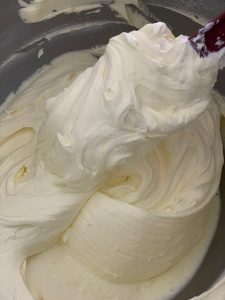
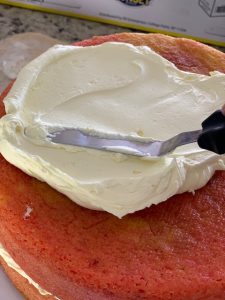
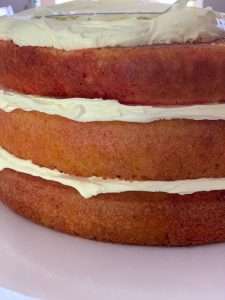
After I thawed my cakes, I added a lemon flavored buttercream as a filling. I iced the outside of the cake with the same lemon buttercream and covered the entire cake in white fondant.
PEPPA PIG FONDANT CUT OUT
I created the Peppa Pig on the side of this cake using a cookie cutter for the head. The cookie cutter I purchased was a 3” cookie cutter. Start by cutting out Peppa’s head using the cookie cutter.
Once Peppa’s head is cut out, you can add the red dress, shoes, arms, magic wand, crown and wings. I created all of these elements using a fondant with a little Tylose mixed in so the fondant was firmed up a bit.
Add small elements to Peppa such as cheeks, nose, eyes and lips using fondant.
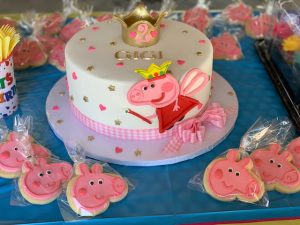
The crown on top of the cake was created using gum paste. Once you cut out the shape that has (4) peaks, join the seam together with a little dab of water. Using lemon extract and a little Rolkem gold, create a paste to paint the crown.
Cut out letters for the name and cut out tiny stars. Paint these using the same gold paint used on the crown.
Cut out hearts using bright pink fondant. Also cut out the number that’s on the crown.
Find the perfect ribbon to put around the base of your cake. Leave enough ribbon so it overlaps at the back. I used glue dots to hold my ribbon in place. The glue dots do not touch the cake at all. It only holds ribbon to ribbon and keeps everything in place.
PEPPA PIG SUGAR COOKIES
Peppa Pig sugar cookies are easy to make. You can find my favorite recipe here: Sugar Cookie Recipe
Roll out sugar cookie dough on a lightly flour-dusted surface. Use the same cookie cutter we used to make Peppa for the cake. Line up cookies onto a cookie sheet leaving space between each cookie. Place entire pan of cookies in the freezer. Yep, another freezer trick.
This cookie dough is perfect to make ahead of time. All you have to do is pop the whole tray in the freezer.
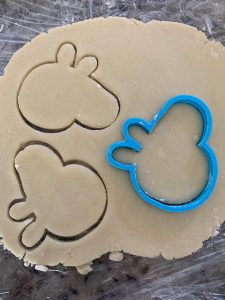
Pre-heat your oven and set the timer to 12 minutes. Put your cookie tray in the oven until the timer goes off. The cookies should be slightly golden color.
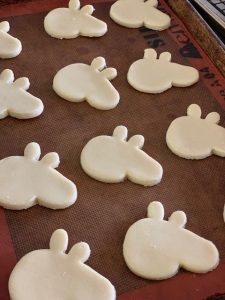
Once the cookies are baked and completely cooled you can stack them until you’re ready to decorate.
DECORATING COOKIES
Decorated Peppa Pig cookies can be done with royal icing or colored fondant. If you’re using fondant, simply use the same cookie cutter used for the cookies and cut out your shapes in the color fondant you want. Brush the backside lightly with a little bit of water and lay it directly on your cookie.
Roll out pink fondant for the outline of the cookies or use pink royal icing to complete decorating the cookies.
I hope you enjoyed this brief tutorial on how to create a Pippa Pig cake…and cookies.
I’d love to hear from you. If you want to know how to create a certain type cake or craft, let me know and I’ll try to create a tutorial with your idea!
